Hiking in Madeira can mean a short forest walk, a day beside an irrigation channel or a demanding crossing of the central mountains. The best route is not necessarily the most photographed one. Choose for your fitness, comfort with heights, available daylight and transport arrangements.
For a first visit, aim for variety: one levada walk, one mountain route and one coastal hike, with room to change plans. Before committing, check the exact route, its current access conditions and any booking requirements. Treat the following routes as a shortlist, not a promise that every path will be suitable on your travel dates.
Levada Walks, Mountain Paths and Coastal Trails
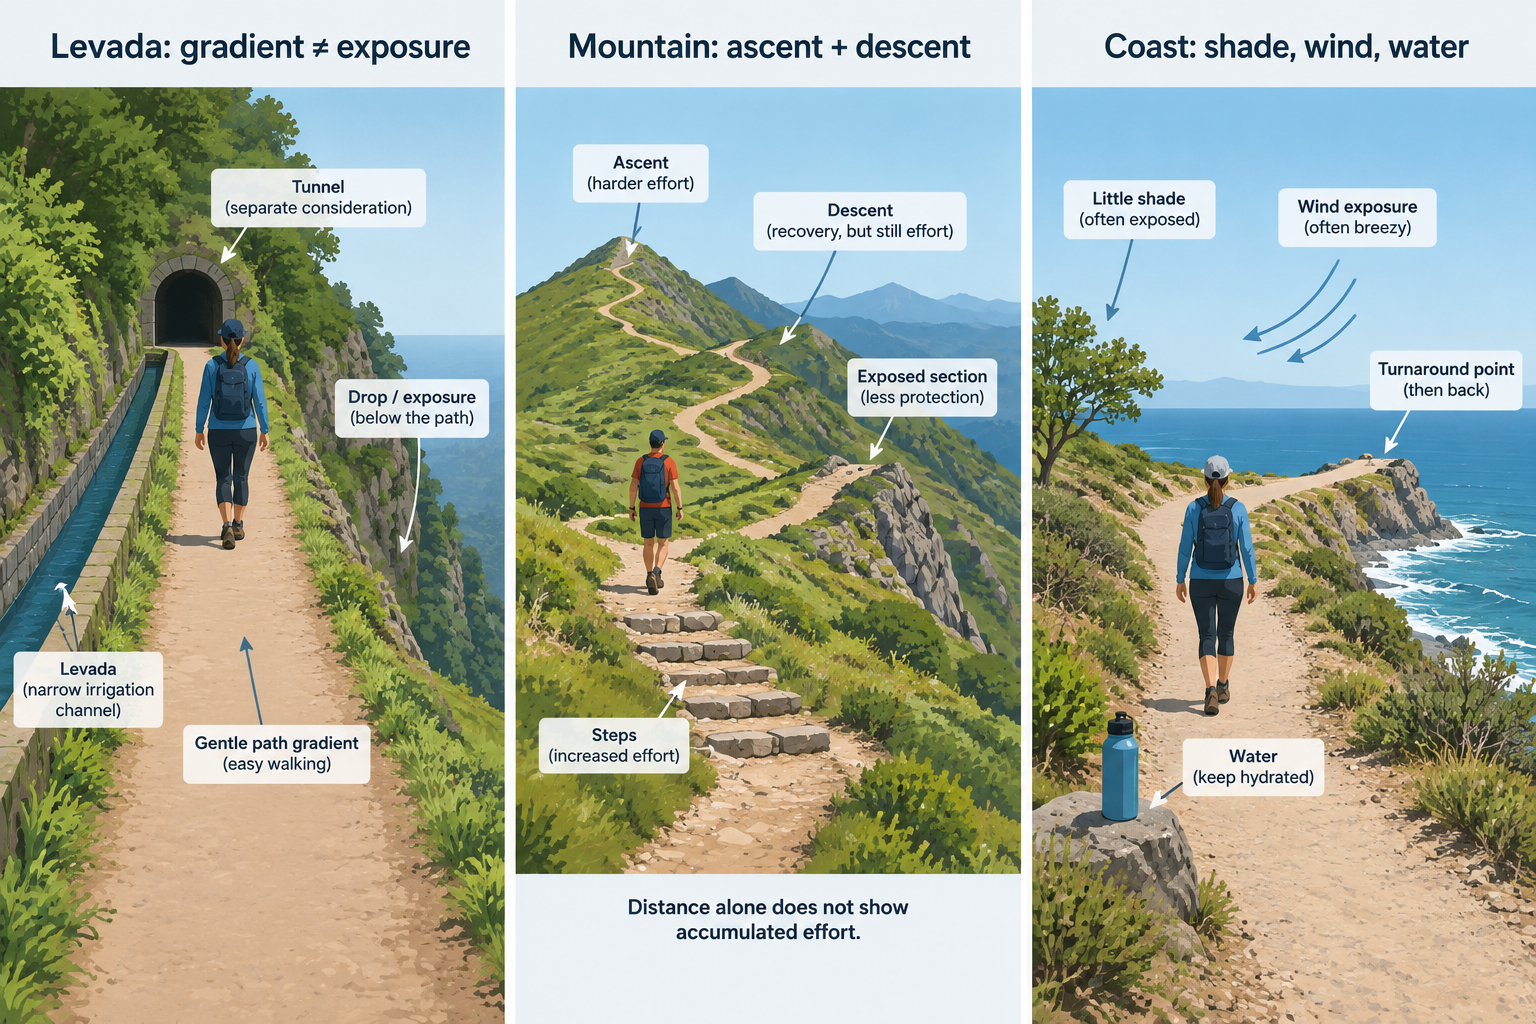
A levada is a water channel, and many Madeira walks follow the maintenance paths beside these channels. The gentle gradient can make the walking less strenuous than a mountain ascent, but it says little about exposure. Assess the width of the path, drops beside it, tunnels and total distance separately from the amount of climbing.
Mountain paths demand a different calculation. Look beyond the distance to the accumulated ascent and descent, stairs, exposed sections and route direction. Starting high does not mean an easy day: a walk between two summits can still involve repeated descents and climbs.
Coastal walks require another set of checks. Consider shade, wind exposure, water supplies and how easily you can turn back. A lower altitude does not automatically make a route the safer choice in poor weather.
Compare routes within the same category before choosing between them. The guide to Madeira’s levada walks focuses on the forest and water-channel routes, rather than treating every levada as an interchangeable afternoon stroll.
Madeira Hiking Bookings and Fees in 2026
For IFCN-managed classified trails covered by the access scheme, book an entry slot through SIMplifica before walking. The 2026 visitor fee is generally €4.50 per person per trail. The full PR1 route has a separate €10.50 fee; the shorter Pico do Areeiro to Pedra Rija return option costs €4.50. These are different ticket options, not two prices for the same walk.
Children aged 12 and under are exempt from payment but still require registration and reservation. Madeira residents also have payment exemptions subject to the applicable documentation. Check the IFCN booking, fee and exemption rules before purchasing.
Combined daily and multiday tariffs do not provide unrestricted access: each intended trail still needs its own reservation, subject to availability. Not every path on the island falls under this system.
Save confirmations before leaving your accommodation. If booking a guided walk or transfer, ask whether the trail reservation and access fee are included. Do not assume a transport booking also reserves your place on the path.
Which Madeira Hikes Should You Choose?
These four options offer different starting points for a walking holiday. Their suitability depends on conditions and your own experience; none should be selected by photographs alone.
Vereda dos Balcões: A Short First Walk
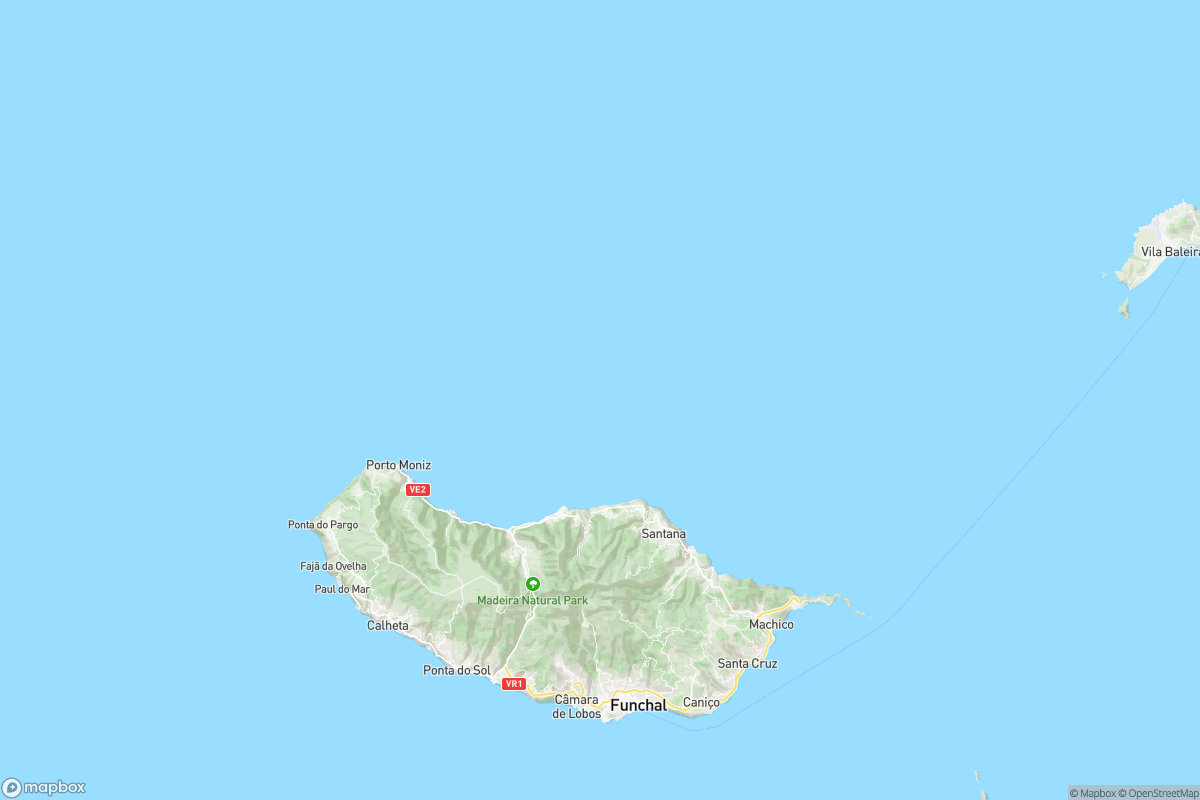
PR11 Vereda dos Balcões begins at Ribeiro Frio and follows the Levada da Serra do Faial to a viewpoint. The official distance is 1.5 kilometres each way, or 3 kilometres return, with an easy difficulty rating. The official Balcões trail description gives the route details and access conditions.
Consider it for an introductory walk or a shorter outing between longer hiking days. Allow time to stop rather than treating the published duration as a target to beat. It is also a sensible opportunity to check whether your footwear and daypack feel comfortable before committing to a longer route.
Levada das 25 Fontes: A Forest and Waterfall Day
Choose 25 Fontes if a levada walk is the main priority. Plan the complete outing rather than focusing only on the section beside the water: identify where you will park or be dropped off, the walking approach and the route back.
Keep optional additions separate from the core plan. Adding another viewpoint or waterfall changes your distance and finish time, even when the paths appear close together on a map. Read the Levada das 25 Fontes hiking guide for the route arrangements before choosing a departure time. Leave enough energy for the return rather than spending the entire allowance on the outward walk.
Pico Ruivo: Choose the Approach Before the Summit
For a mountain outing, start by comparing the available approaches to Pico Ruivo. Do not use “Pico Ruivo hike” as though it describes one fixed route. Your starting point, finishing point and any connection with PR1 change both the physical demands and transport plan.
The Pico Ruivo route and preparation guide separates those choices. Decide whether you want a summit walk returning to the same trailhead or a longer crossing requiring collection elsewhere. For either option, make good visibility and manageable wind conditions part of the decision, rather than treating the summit as an appointment you must keep.
Ponta de São Lourenço: A Contrasting Coastal Walk
Include Ponta de São Lourenço if you want a coastal outing rather than another forest walk. Check the forecast for the peninsula itself, paying attention to wind as well as temperature. Plan water, sun protection and your turnaround point before setting off.
The Ponta de São Lourenço hiking guide covers the route in more detail. Avoid pairing it automatically with a demanding morning hike just because both fit into the same calendar day. Travel, preparation and the return walk all need space in the schedule. A coastal path is still a hike, not the cooling-down lap.
Trail Status and the PR1 One-Way Rule
Check the official status of your chosen path before departure and again before starting. Read the accompanying notice, not just an “open” or “restricted” label. A restriction may affect the section you intended to use, and an old downloaded track does not override a closure or instruction on the ground.
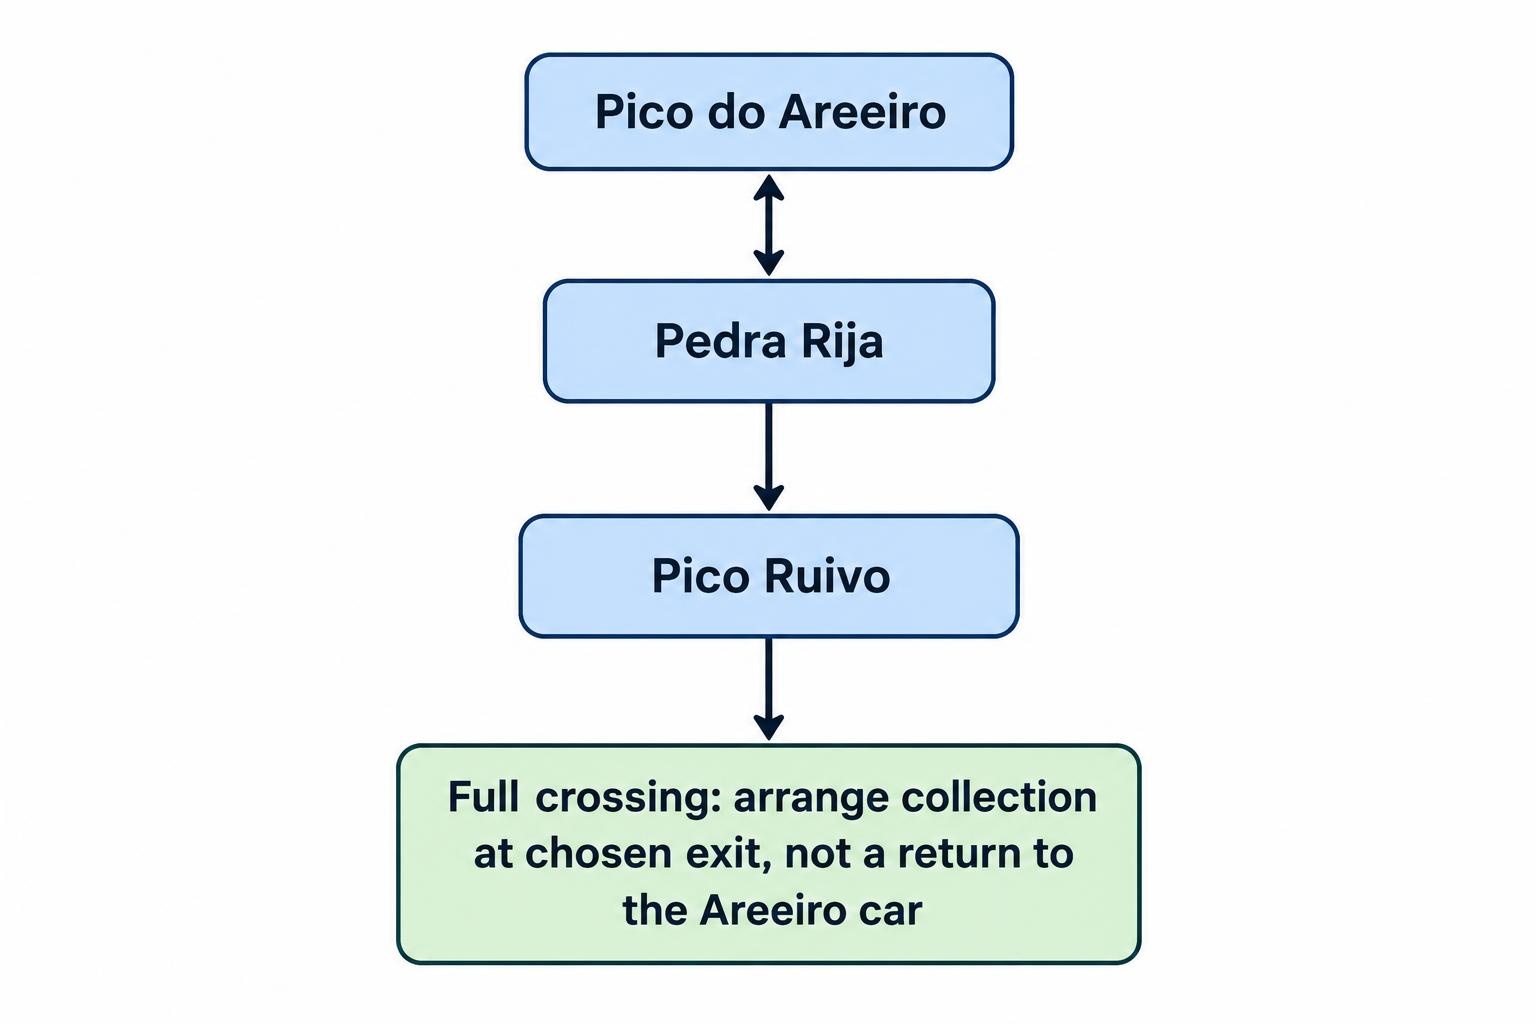
PR1 needs particular care when arranging transport. The route is bidirectional between Pico do Areeiro and the Pedra Rija viewpoint. Beyond Pedra Rija, the direction is one way toward Pico Ruivo, so a full crossing is not a conventional return hike to a car at Areeiro. The IFCN trail notices and PR1 access rules explain the permitted direction and exit arrangements.
Arrange collection at your chosen exit before starting. If an operator changes the itinerary because of access restrictions, confirm the new walking distance and pickup point rather than assuming only the scenery has changed.
When to Go Hiking in Madeira
Separate the season from the forecast. Madeira’s rainfall is generally greater in autumn and winter, while local temperature, rainfall and wind differ between northern and southern slopes and between low and high ground. These differences are documented in IPMA research on Madeira’s climate and terrain.
For planning purposes, keep the clearest suitable weather window available for your mountain day. Do not lock every hike into an unchangeable sequence before you arrive. A forecast for Funchal should not be your only weather check for an outing elsewhere on the island.
Check wind, rain and visibility, then consider what those conditions mean for the chosen terrain. Poor visibility removes much of the reason for choosing a panoramic route; strong wind can make exposure the deciding issue.
Calculate your finish time using the daylight available on your actual date. If an early start involves walking in darkness, assess that as a separate undertaking, not simply an earlier version of the same daytime walk.
Getting to the Trailhead and Back
Decide how you will return before deciding how you will arrive. For a walk that returns to its starting point, compare the full driving and walking day. For a crossing, confirm both trailheads and the collection arrangement in writing.
A rental car, prebooked transfer and guided outing solve different problems. Compare them through the guide to getting around Madeira, then check the arrangements for your chosen hike. Do not budget only for the outward journey.
If considering a bus, verify the current timetable, operating days, nearest stop and final return service. Include any walking between the stop and trailhead in your distance estimate. A stop near a route on a map is not necessarily a practical starting point.
With a transfer, ask how much walking time is allowed, what happens if the route closes and how to contact the driver. With a guided outing, ask about group pace and the response if someone needs to turn back. Choose the service that matches the support you need, not just the lowest advertised price.
What to Carry on a Madeira Hike
Pack for the route and the consequences of a delay. Start with footwear that grips well and feels secure on descents. Test it before your longest walking day rather than relying on a new pair straight from the box.
- Carry water for the full outing, food and a small reserve.
- Bring a waterproof outer layer and suitable warm clothing.
- Use a headlamp for routes involving tunnels, with spare power.
- Save the route, booking confirmation and pickup details offline.
- Carry a charged phone, power bank and basic first-aid supplies.
- Add sun protection appropriate to the route and forecast.
Keep the load manageable without removing items you may need if the walk takes longer than expected. Store clothing and electronics where rain cannot soak them. The Madeira packing list covers the wider holiday; your hiking bag should be a deliberate selection from it, not everything you brought to the island.
Safety, Heights and Turning Back
Match the walk to the least confident person in your group. Ask about comfort with narrow paths, drops, tunnels and long descents, not just general fitness. A strong walker can still dislike exposure, and there is little value in discovering that far from the start.
Set a turnaround time before leaving and share your route and expected return with someone who is not on the walk. Madeira’s official walking safety advice recommends staying on the path, finishing before nightfall and not continuing in heavy rain or strong winds. The emergency number is 112.
Never bypass a barrier because other walkers have done so. Avoid improvised shortcuts and do not use a navigation app as permission to enter a closed section. If conditions deteriorate, reassess early rather than waiting until continuing feels like the only option.
Keep stops and photographs away from places where they obstruct other walkers. Carry out your rubbish, leave plants where they grow and avoid disturbing wildlife. The practical aim is straightforward: finish with enough time, energy and attention to make sound decisions on the return.
Build a Walking Schedule With Room to Change
For a first Madeira trip, choose two or three priority hikes and a shorter alternative rather than filling every day. Place a less demanding day after your longest walk, particularly if you are not accustomed to repeated hiking days.
Review the next outing each evening using the weather, trail notices, transport availability and how everyone feels. If someone is tired or uncomfortable, shorten the plan before setting off. A flexible schedule gives you more chances to enjoy the routes you choose, without turning a walking holiday into a daily test of whether yesterday’s optimism was justified.